
Printing and Exporting
The schedule, in its graphical form, and the reports, in tabular form, can be printed, exported to PDF or image files, published to a website, or automatically delivered by email or to smartphones.
If you want to print or export the schedule, first make sure you are in the Schedule module (the tab in the bottom-left corner of the workspace). If you want to print or export a report, switch to the Reports module.
To open the Print/Export window, select File → Print/Export from the main menu. This will open up the print/export window. The first option in this window is Export to, which determines the output format.
Contents
Printing and Exporting to PDF
- To print, select a printer from the Export to list.
- To export to a PDF file, select Export to → Document (PDF).
Now let's look at a few examples of printing and exporting to PDF, and see which settings are used to generate each result.
One schedule on each page
In this scenario, we want each schedule to be generated on a separate page:
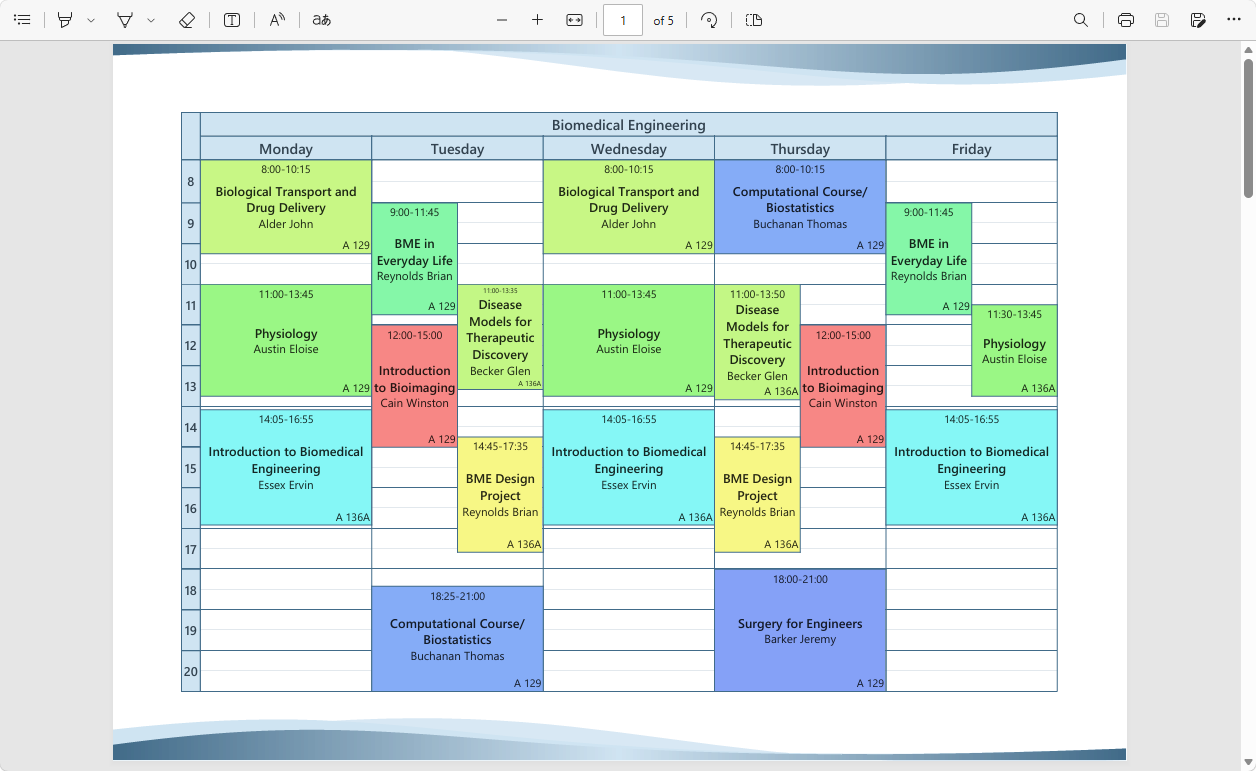
To export schedules so that each schedule appears on a separate page, use these two settings:
- To print all course schedules, click the check box near Courses.
- To print all instructor schedules, click the check box near Instructors.
- For each schedule to appear separately, make sure Resources → Separate table for each resource is selected.
Additional optional settings:
- To generate a color printout, select Options → Export in color: Yes.
- To make the text significantly larger than it appears on screen, select Options → Text → Adjust all font sizes by: +5.
- To add the wavy decoration at the top and bottom of the page, select Options → Page → Decoration: Decoration 4.
- To use horizontal page orientation, select Options → Page → Orientation: Landscape.
Several schedules on each page
In this example, each page is divided into several smaller sections, each containing a schedule:
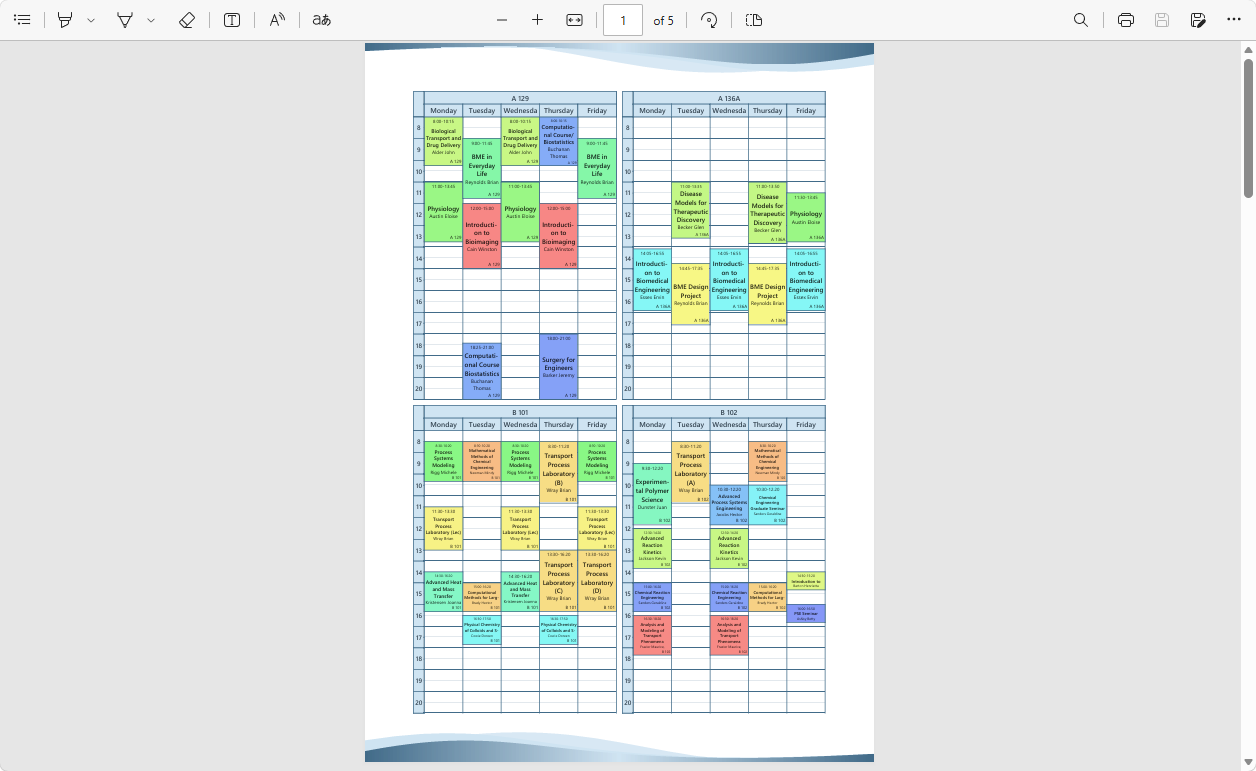
To print several tables on each page like above, select:
- Options ⟶ Tables ⟶ Lay out multiple tables on each page, and under that:
- Tables per page horizontally: 2
- Tables per page vertically: 2
Unified schedule on one page
In this example, we want a unified room schedule to be printed on a single page in one table:
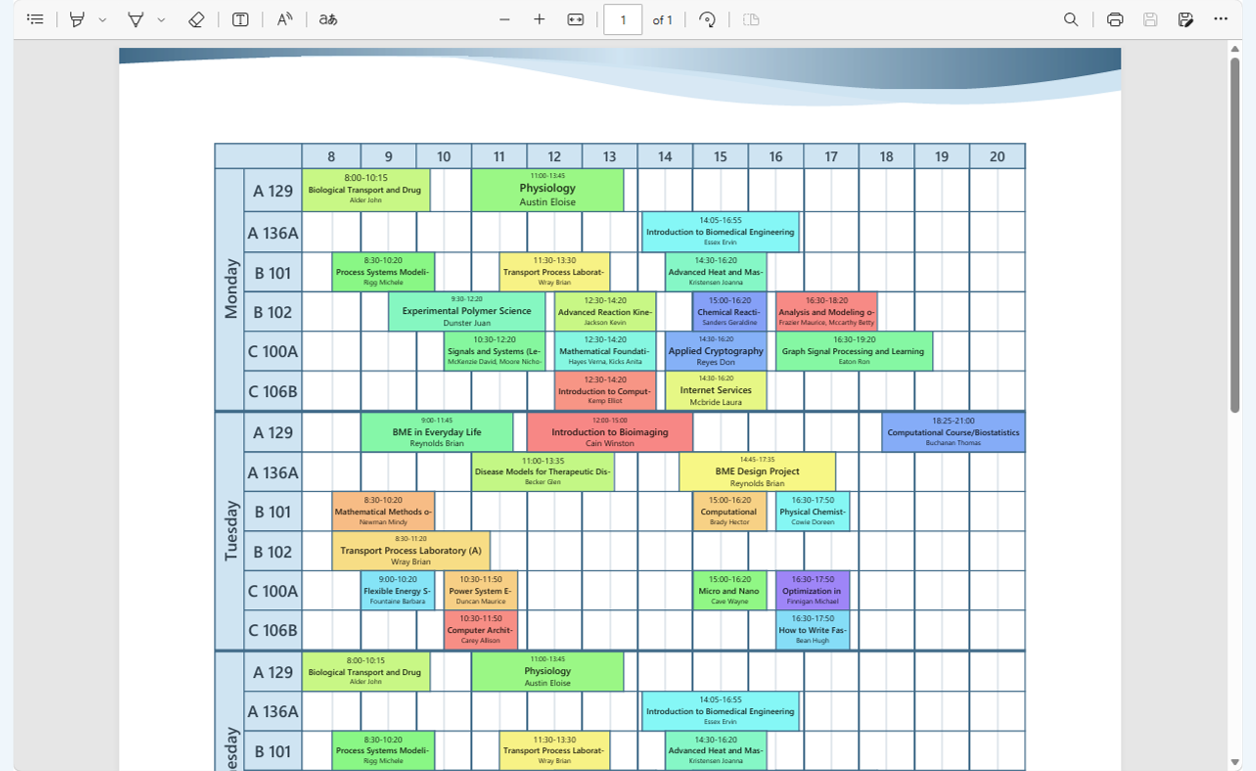
To achieve this layout, use these settings:
- For all courses to appear in a single unified schedule, deselect Resources ⟶ Separate table for each resource.
- For a layout in which the rooms and days are arranged along the vertical axis and the times along the horizontal axis, select Axes ⟶ Horizontal: Time; Vertical: Days+Rooms.
Here is another example of a unified schedule, this time the fourth layout was used: Axes ⟶ Horizontal: Rooms, Vertical: Days+Time:
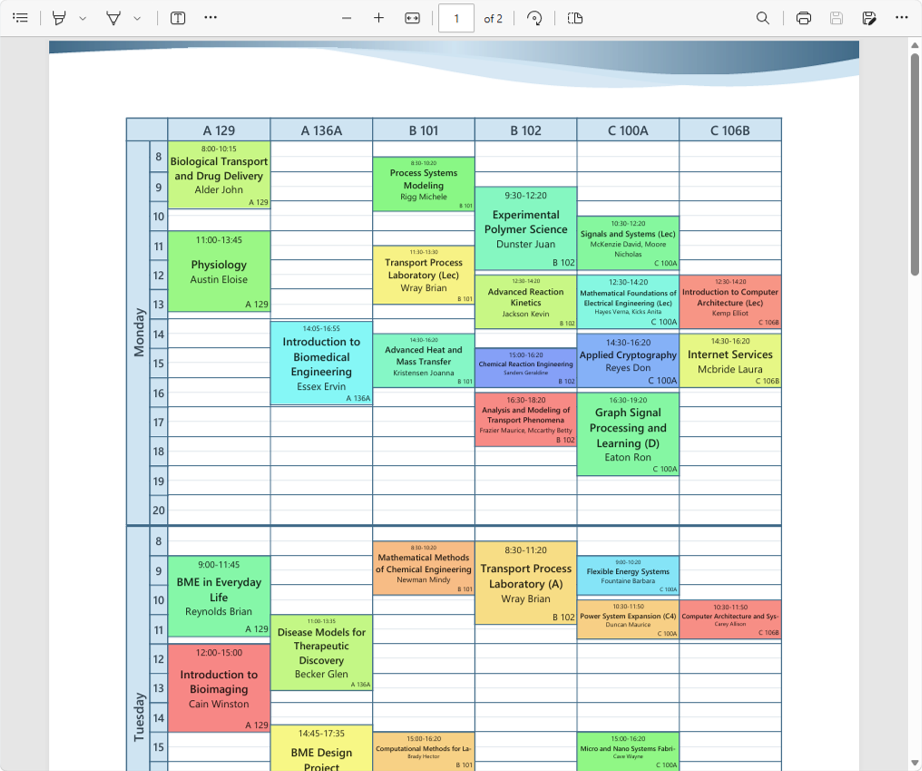
Note: There are 4 different possible layouts of the axes when printing a unified schedule of resources (courses, groups, instructors, rooms or students). The options are:
- Axes ⟶
- Horizontal: Days+Resources, Vertical: Time
- Horizontal: Time, Vertical: Days+Resources
- Horizontal: Days+Time, Vertical: Resources
- Horizontal: Resources, Vertical: Days+Time
Unified schedule on several pages
A large schedule can be configured to span multiple pages. Here is an example of an instructors' schedule that spans two pages horizontally:
To span a schedule across two pages horizontally, select:
- Options ⟶ Tables ⟶ Span each table over multiple pages, and under that:
- Pages per table horizontally: 2
- Pages per table vertically: 1
Unified daily schedule
Each day of a unified schedule can be printed on a separate page, like this:
To print each day in a separate table, select:
- Time ⟶ Separate table for each day (select Day instead of the default Week)
Exporting to Images
- To export schedules to images, select Export to ⟶ Images at the top of the print/export window.
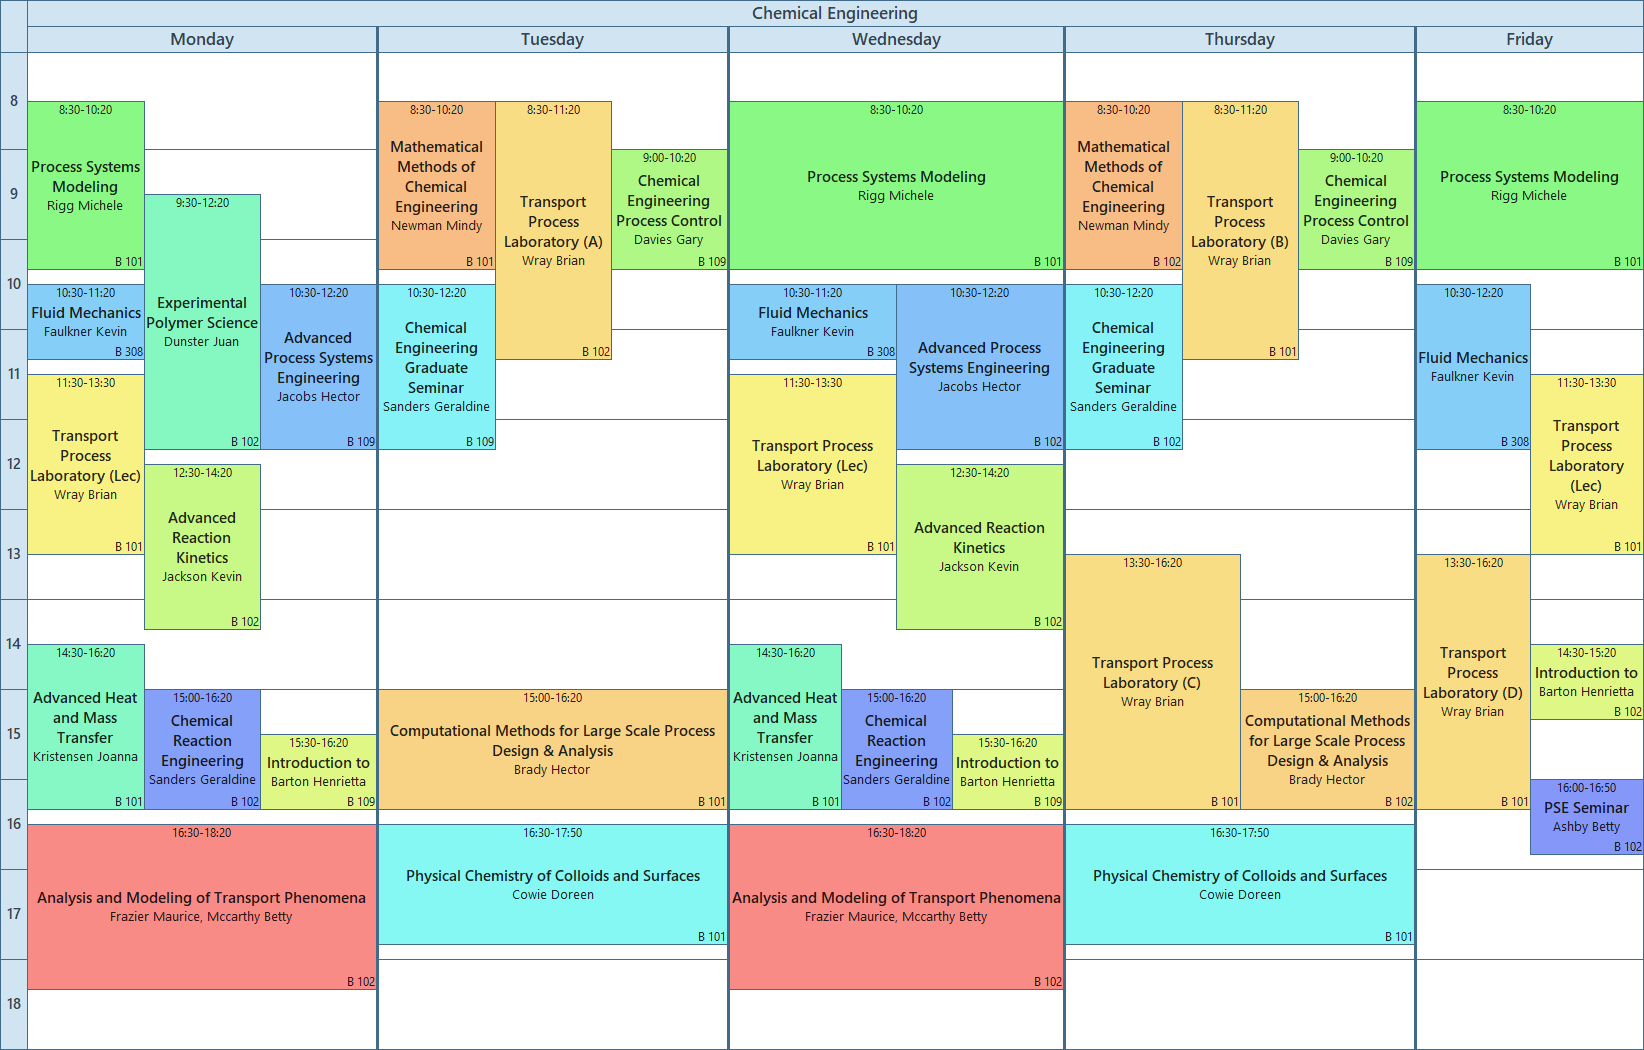
When exporting to images, the same options and layouts are available as when exporting to PDF. In addition, you can either specify the dimensions of the exported image or let the program determine them automatically, using the minimum size required to display the contents of all schedule cells. Because images are often viewed on smartphones, the automatic minimum image size ensures that the text appears as large and readable as possible on a small screen.
Here is an example of an instructor schedule exported using the automatic image size option:
And here is the same schedule exported at a fixed size of 700 × 700 pixels:
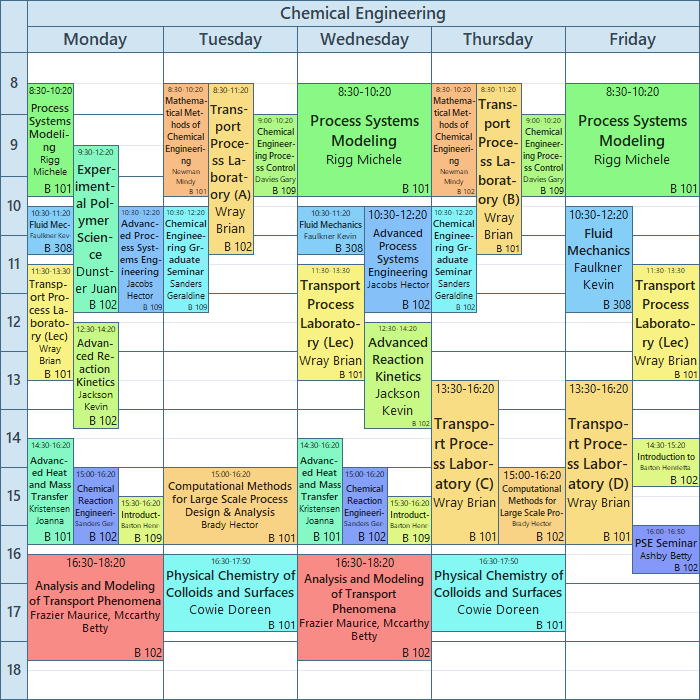
The setting that controls the image size is located under Options ⟶ Image and provides the following two options:
- Adjust image size to contents
- Fixed size, which allows you to specify the Width and Height in pixels
Exporting to a Presentation
A presentation is an automatically playing slideshow of schedules. It is typically used to display schedules on a large screen located at the entrance or in a hallway. The presentation can display schedules for courses, programs, rooms, or a large unified schedule containing all resources. You can configure how long each slide is displayed.
A presentation can be exported to a local folder, a network folder, or a website. The presentation is generated in HTML format and displayed in a standard web browser running in full-screen mode. The website can be configured to refresh automatically at regular intervals, so if the presentation is re-uploaded, the displayed content will update automatically without any human intervention.
- To create a presentation, select Export to ⟶ Presentation at the top of the print/export window.
Here is an example of a daily room schedule exported for display on a large screen:
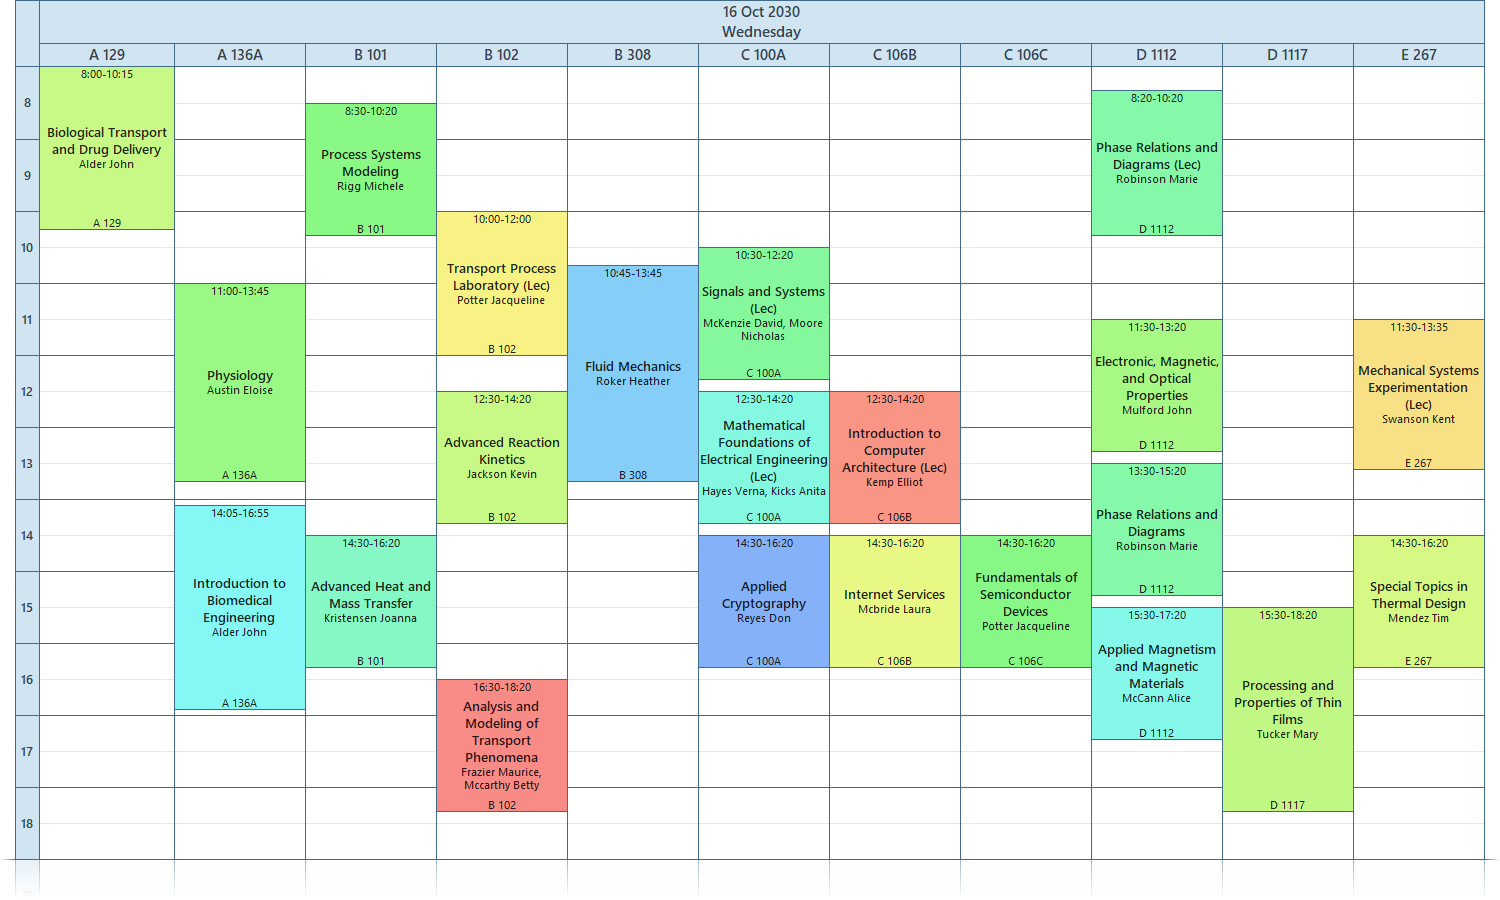
To control the slideshow speed and refresh interval, use the following settings under Options ⟶ Page:
- Auto scroll every few seconds – Sets the amount of time each slide is displayed before automatically advancing to the next one. If this option is not enabled, a drop-down list will appear at the top of the page, allowing users to select slides manually.
- Auto refresh every few minutes – Sets how often the entire presentation is reloaded. If updated content is published to the same folder or website, the presentation will automatically refresh and display the latest version.
Exporting to a Website
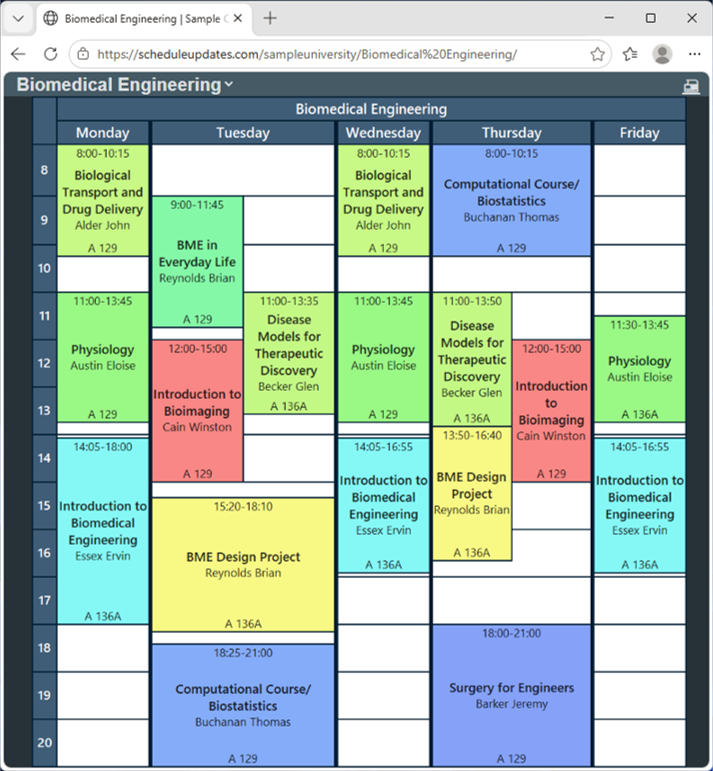
Exporting schedules to a website allows students and instructors to view their up-to-date schedules online from both computers and smartphones. The website uses a responsive design, displaying a weekly schedule on computer screens and a daily schedule on smartphones, with the option to select the day to view.
- To export schedules to a website, select Export to ⟶ Website at the top of the Print/Export window.
Here is an example of how a weekly course schedule appears in a desktop web browser:
And here is an example of the same schedule displayed in a smartphone web browser:
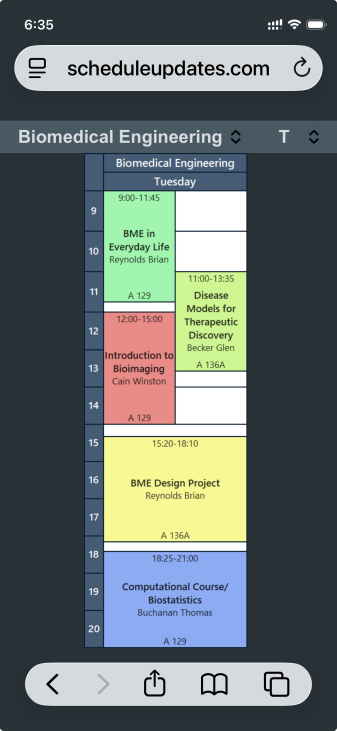
Note: When exporting personal schedules for instructors or students, the program can anonymize the address of each user's page, preventing other users from guessing or accessing it. To enable address anonymization, select Options ⟶ Anonymize ⟶ Anonymize page addresses.
Sending by Email
Personal instructor, student, and group schedules can be automatically sent by email. Emails can be sent from schedule@scheduleupdates.com or from another address configured by the school using any SMTP email server.
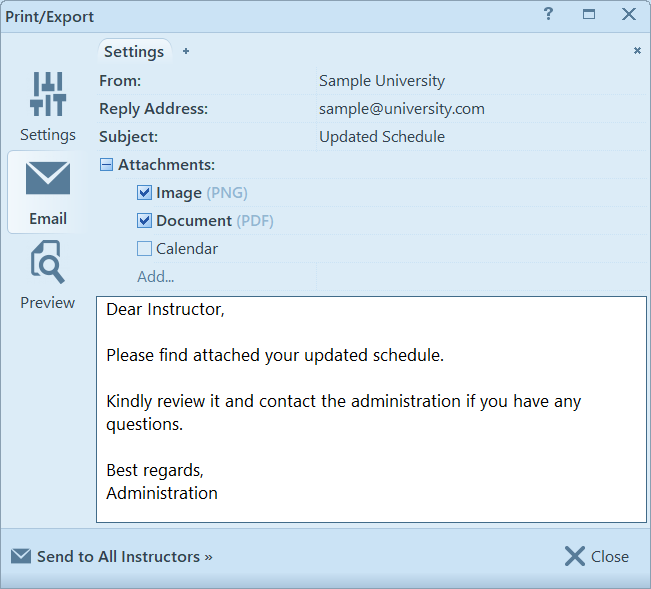
Each email contains custom message text and may include a schedule image and/or PDF attachment.
Email addresses are taken from the Email property of instructors and students. They can be entered manually or imported from a CSV file.
- To send schedules by email, select Export to ⟶ Email at the top of the Print/Export window.
The contents of the email message can be edited by clicking the Email icon on the left side of the Print/Export window:
Sending via Telegram
Just as schedules can be sent by email, they can also be sent via the Telegram smartphone app. Telegram is free to use and allows messages to be sent directly to individuals using their phone numbers, or to Telegram channels, which may be either public or private.
- To send schedules via Telegram, select Export to ⟶ Smartphone (Telegram) at the top of the Print/Export window.
Sending messages via Telegram requires the administration to set up a Telegram bot. Creating a bot is simple and can be done by following these steps:
- On a smartphone, open the link "t.me/BotFather"
- Click Start at the bottom of the chat
- Type "/newbot" and follow the instructions
- At the end of the setup process, Telegram will display your bot token. Copy and paste this token into the Bot Token field in the Print/Export window.
Before a bot can send messages to a Telegram user, the user must register with the bot once. To register, the user needs to search for the bot by name in Telegram, open the chat, and click Start at the bottom of the screen. After registration, the bot will be able to send messages to that user on Telegram using the phone number associated with the user's Telegram account.
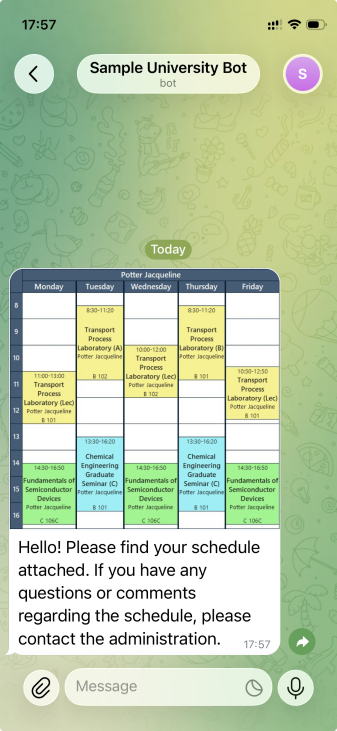
Here is an example of a schedule sent as a Telegram message:
The next chapter: Importing Data.