
Activities
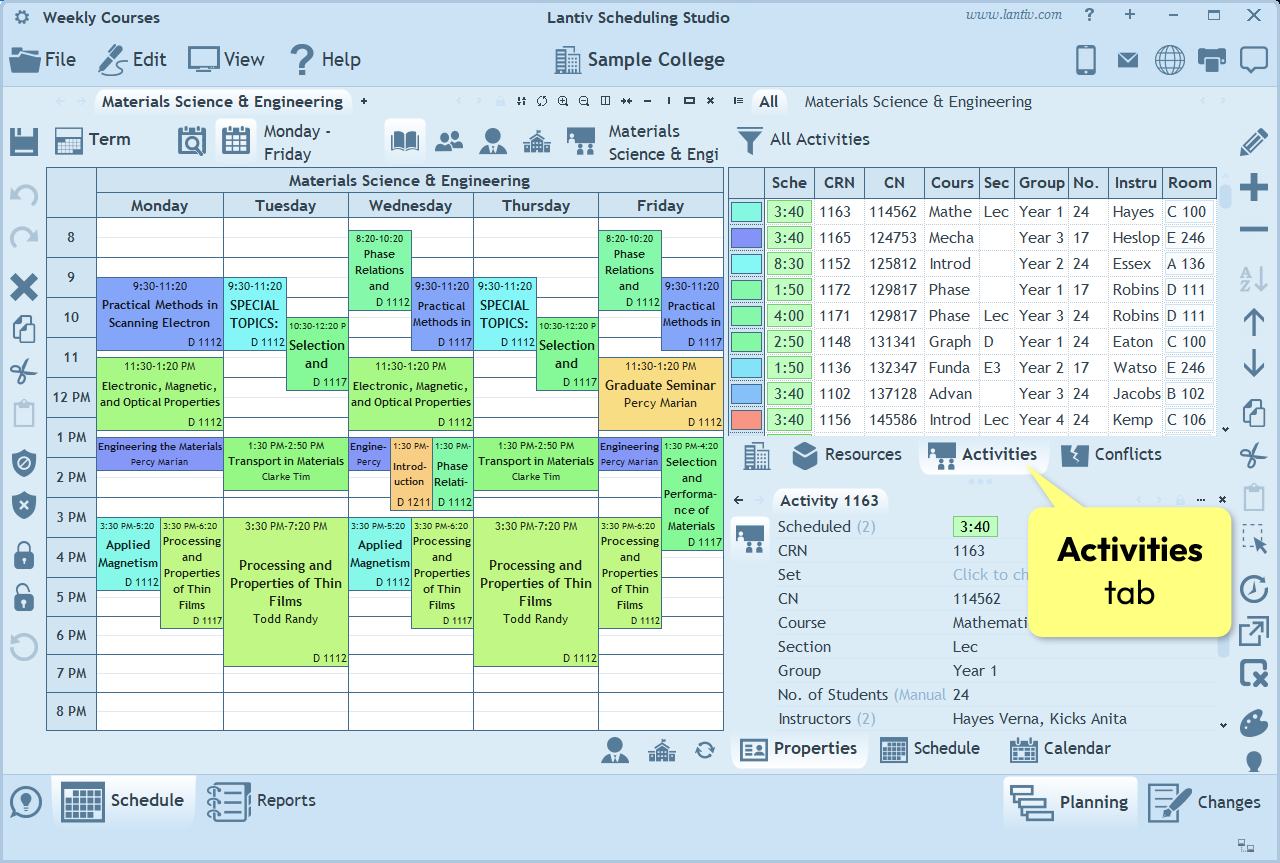
The Activities pane comes after the Resources pane and is the third pane in the data-entry workflow. Entering activities is a crucial step in the scheduling process. As you will soon discover, activities form the core building blocks from which the entire schedule is created.
Contents
- 1 What are activities?
- 2 Activities List
- 2.1 Scenario 1: Course, Instructor and a Single Room
- 2.2 Scenario 2: Course, Programs and an Instructor
- 2.3 Scenario 3: Course, Section, Instructor and Students
- 2.4 Scenario 4: Course, Section, Instructor and a Recurrence Pattern
- 2.5 Scenario 5: Course, Groups, Instructor, Room, Length and Quantity
- 2.6 How to choose which columns are visible?
- 3 Entering Activities
- 3.1 How to add activities?
- 3.2 How to edit activities?
- 3.3 How to fill in the values of an activity?
- 3.4 How to quickly select a single resource in a pop-up list?
- 3.5 How to modify a property of multiple activities at once?
- 3.6 How to quickly create one activity for each resource?
- 3.7 How to enter length and quantity?
What are activities?
An activity represents an association of several resources, all of which are scheduled together as one unit.
A few facts about activities:
- When an activity is scheduled at a specific time, all participating resources are booked for that activity at that time.
- A single activity can be scheduled multiple times during the week or term. Each occurrence is represented by one cell in the schedule.
- The total number of planned cells is defined by the activity's Quantity property. If the number of planned cells is not predetermined, this field can be left empty.
- If you delete an activity from the schedule of one of its resources, it is automatically removed from all of them.
- An activity does not necessarily have to include all resource types. For example, you can create an activity without specifying a room, students, or equipment.
- An activity can include multiple resources of the same type. For example, it may involve 3 instructors and 2 groups.
- Different cells of the same activity can involve different resources. For example, the activity may be scheduled in Room 1 on Monday and in Room 2 on Wednesday. This is explained in more detail below.
- Multiple activities that need to be scheduled simultaneously can be grouped into a Set, as explained below.
Activities List
You can find the list of activities in the Activities pane. Think of it as a spreadsheet: each row represents one activity, and the columns show the resources involved, along with other activity-related details such as statistical values or custom text properties. Which columns you actually need to see depends on the institution, so this list can look a bit different from one place to another. In the sections below, we’ll walk through a few common scenarios and show examples of how the activities list might be set up.
Scenario 1: Course, Instructor and a Single Room
In this scenario, each activity has a course, a single instructor, and a single predesignated room. All occurrences of the activity (an occurrence is a single event of the activity, for example, Monday from 8:00 to 10:00) take place in the same room and involve the same instructor.
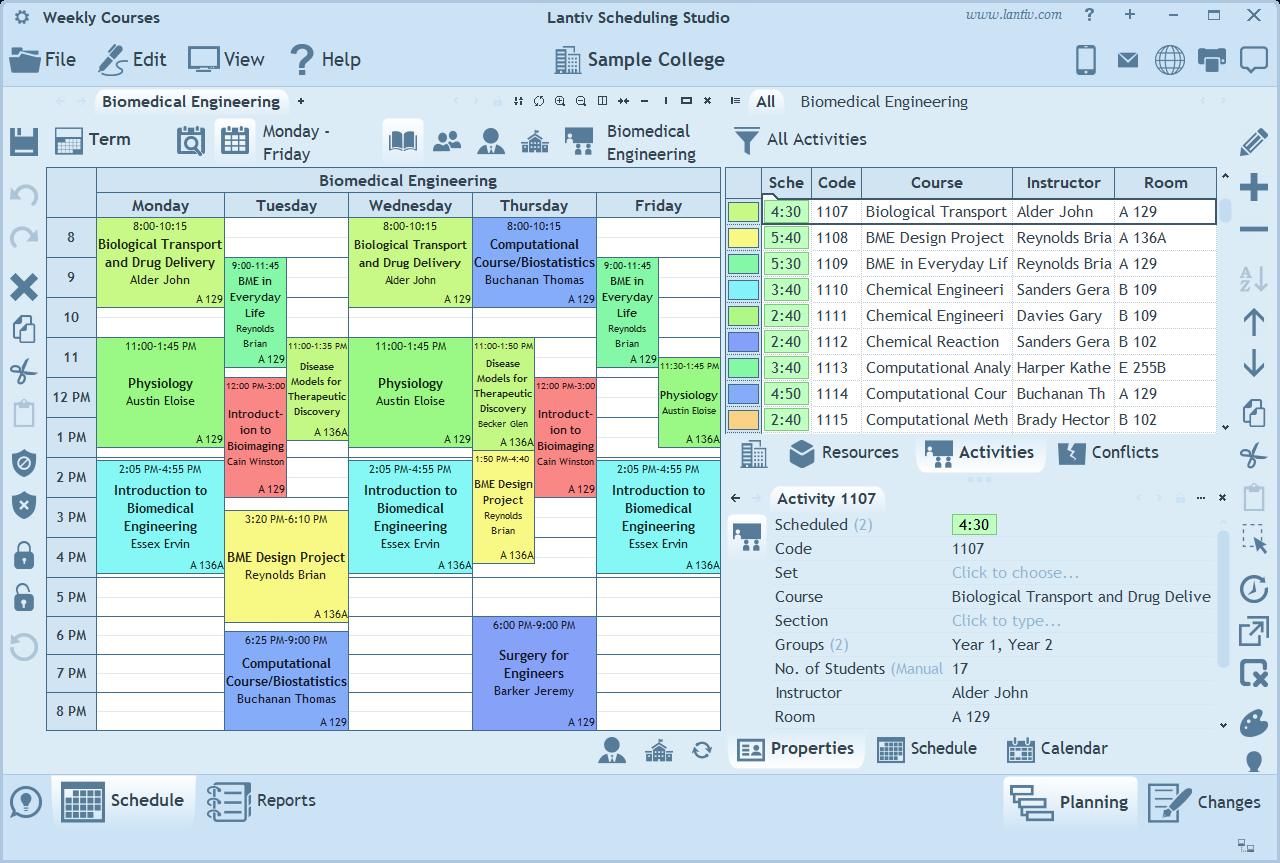
A few notes relevant to this scenario, as well as to all the scenarios below:
- The leftmost column in the list displays the color assigned to one of the activity's resources. In most examples, colors are assigned to the course, so the color shown in this column is usually the course's color.
- The Sched. column on the left-hand side shows the total number of hours and minutes for which each activity has been scheduled.
- The Code column contains an ID that can be assigned to each activity. Entering this ID is optional.
Scenario 2: Course, Programs and an Instructor
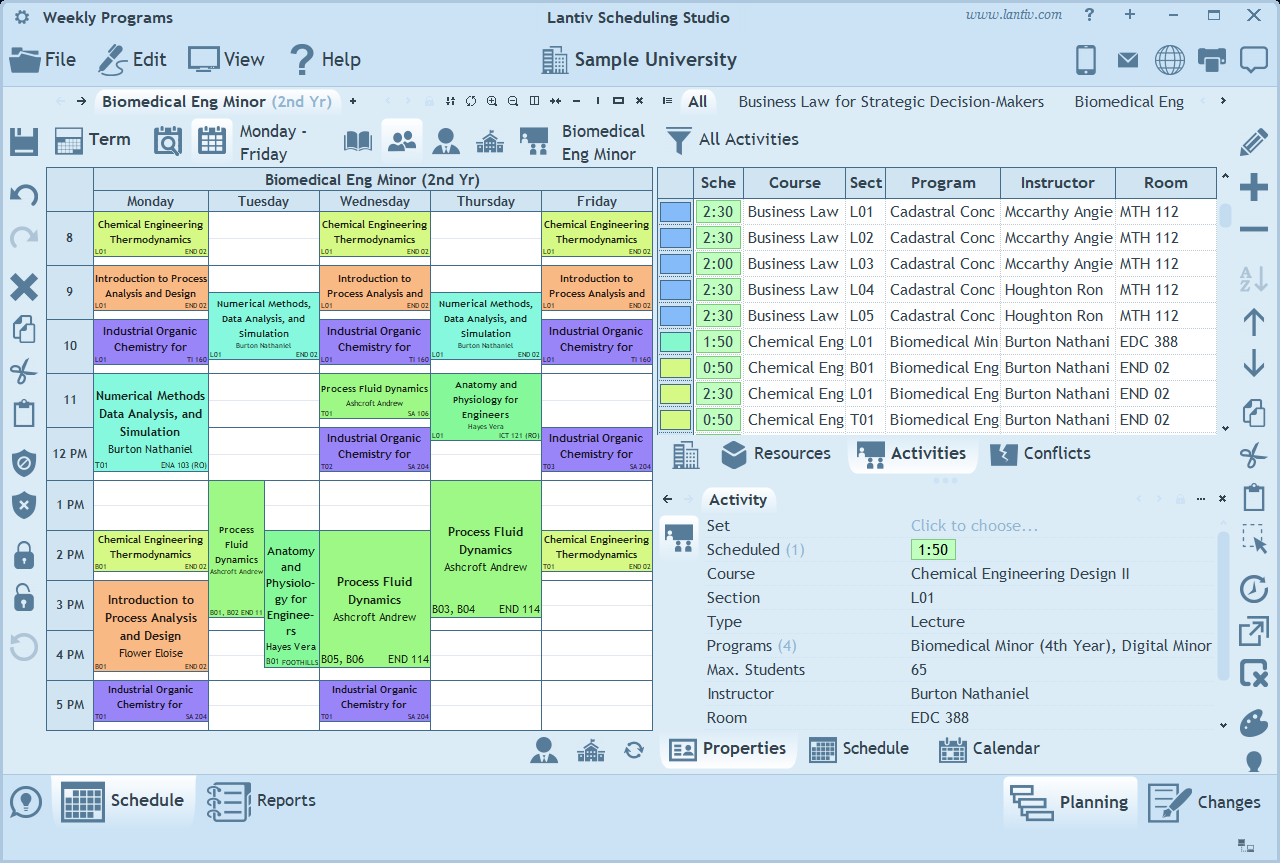
In this scenario, activities have a course, one or more programs, and a single instructor, but they can be scheduled in any suitable room. Each occurrence of an activity can be scheduled in a different room, as long as the room is suitable for the course and can accommodate the number of students in the activity.
Scenario 3: Course, Section, Instructor and Students
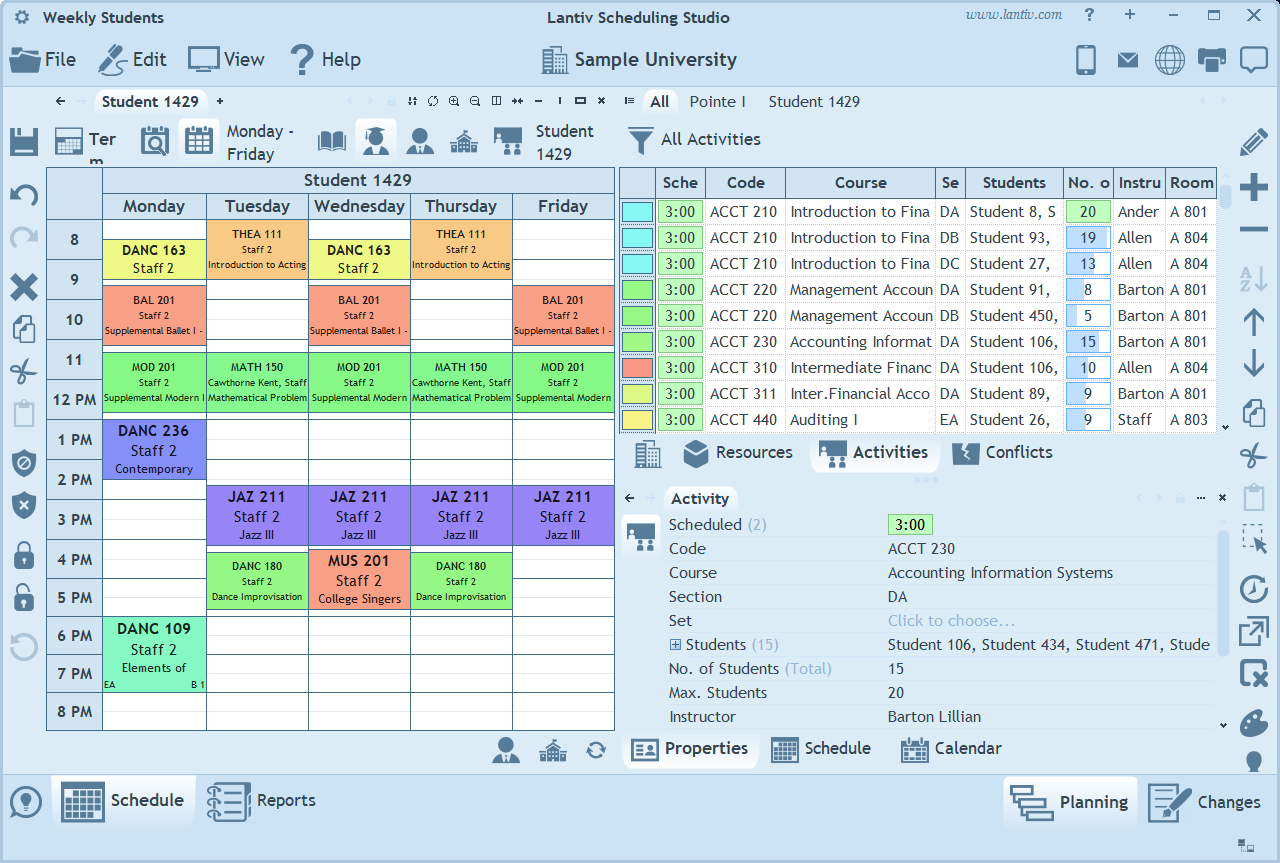
In this scenario, each activity also has a section number and a student list containing the names of the students enrolled in the activity. All scheduled occurrences of the activity will appear in the students' personal schedules.
Scenario 4: Course, Section, Instructor and a Recurrence Pattern
In this scenario, the recurrence pattern according to which an activity is scheduled is displayed as part of the activities list. A recurrence pattern defines the exact days or dates on which the activity takes place by specifying a start date, an end date, and the days of the week. Other recurrence options are also available, such as every 3 days or every 2 weeks. The start and end times of each occurrence are defined by filling in the corresponding time fields.
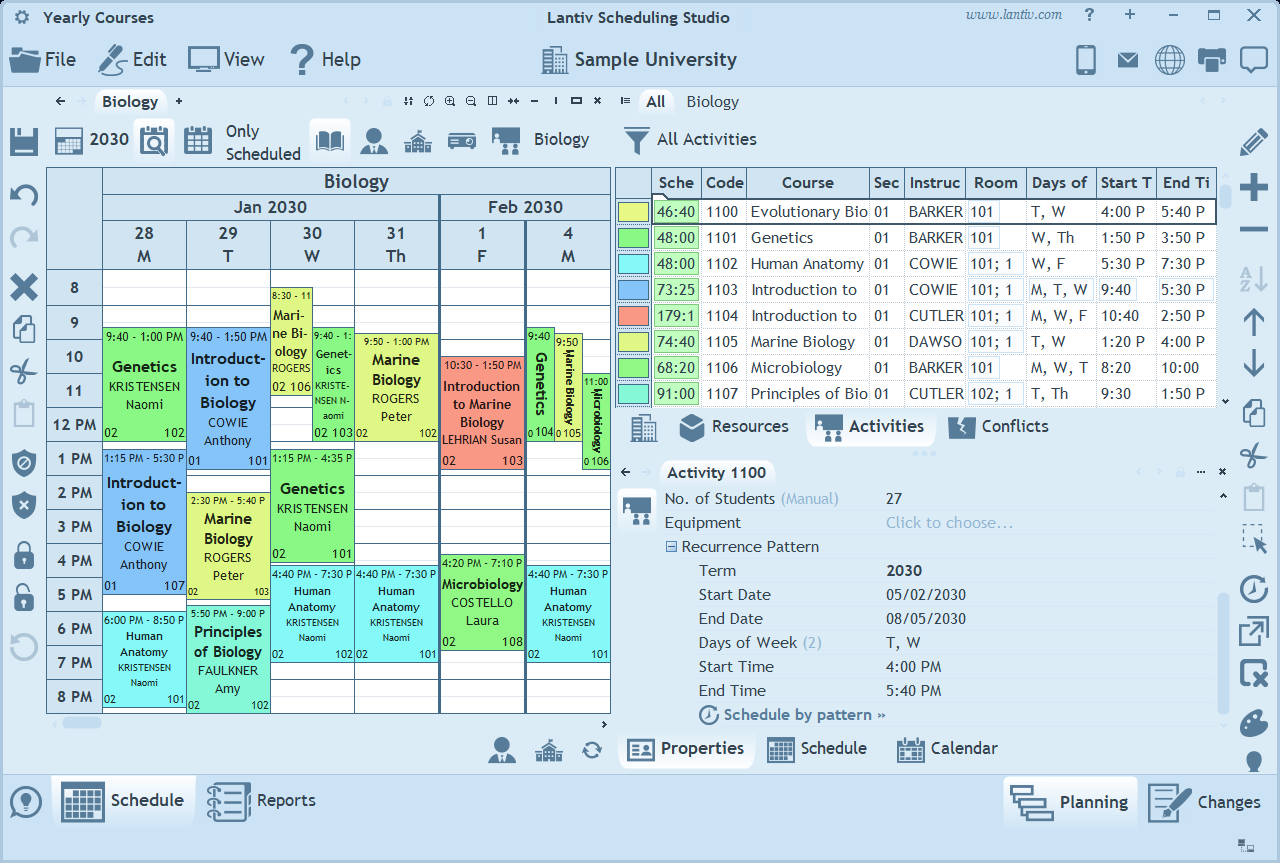
Note: A recurrence pattern can also be specified in any of the previous scenarios. It does not have to be displayed as separate columns in the activities list, because it can always be edited in the Properties pane instead.
Scenario 5: Course, Groups, Instructor, Room, Length and Quantity
In this scenario, activities involve one or more groups. When multiple groups (or, in fact, multiple resources of any type) are assigned to the same activity, the scheduled activity appears in the schedules of all of them.
This scenario also introduces two additional columns: Length and Quantity.
- The Length is the duration of a single occurrence of an activity.
- The Quantity is the total planned duration of all occurrences of the activity during a week or the entire term.
For example, the length of an activity can be set to "1:30" (1 hour and 30 minutes) and the quantity to "4:30" (4 hours and 30 minutes). This means that the activity is planned to be scheduled three times, each occurrence lasting 1 hour and 30 minutes. The quantity is usually a multiple of the length. If you enter "0" in the Quantity field, the quantity is considered unlimited.
If the institution's time scale is based on periods, the Quantity and Length fields can be specified as the number of periods instead of hours. For example, the length of an activity can be 2 periods and the quantity 4 periods. This means that each occurrence always occupies two consecutive periods, and the activity is planned to be scheduled for a total of four periods during the week or the term (that is, two occurrences of two consecutive periods each). When the length is a single period, there is no need to enter 1 in the Length field because this is the default value. When the Quantity is specified in periods, the Scheduled column also displays the total number of scheduled periods rather than the total number of scheduled hours.
How to choose which columns are visible?
As you have seen in the scenarios above, the activities list can look quite different depending on an institution’s needs. You can control which columns appear in this list from the Institution pane’s Properties page' (under the Activity resource). On that page, you need to do the following:
- Enable the desired properties by checking the boxes next to them.
- Set the column widths for the columns you want to appear in the activities list.
- If needed, add custom properties.
Here is an example showing how the columns are configured to produce the layout used in the first scenario above:
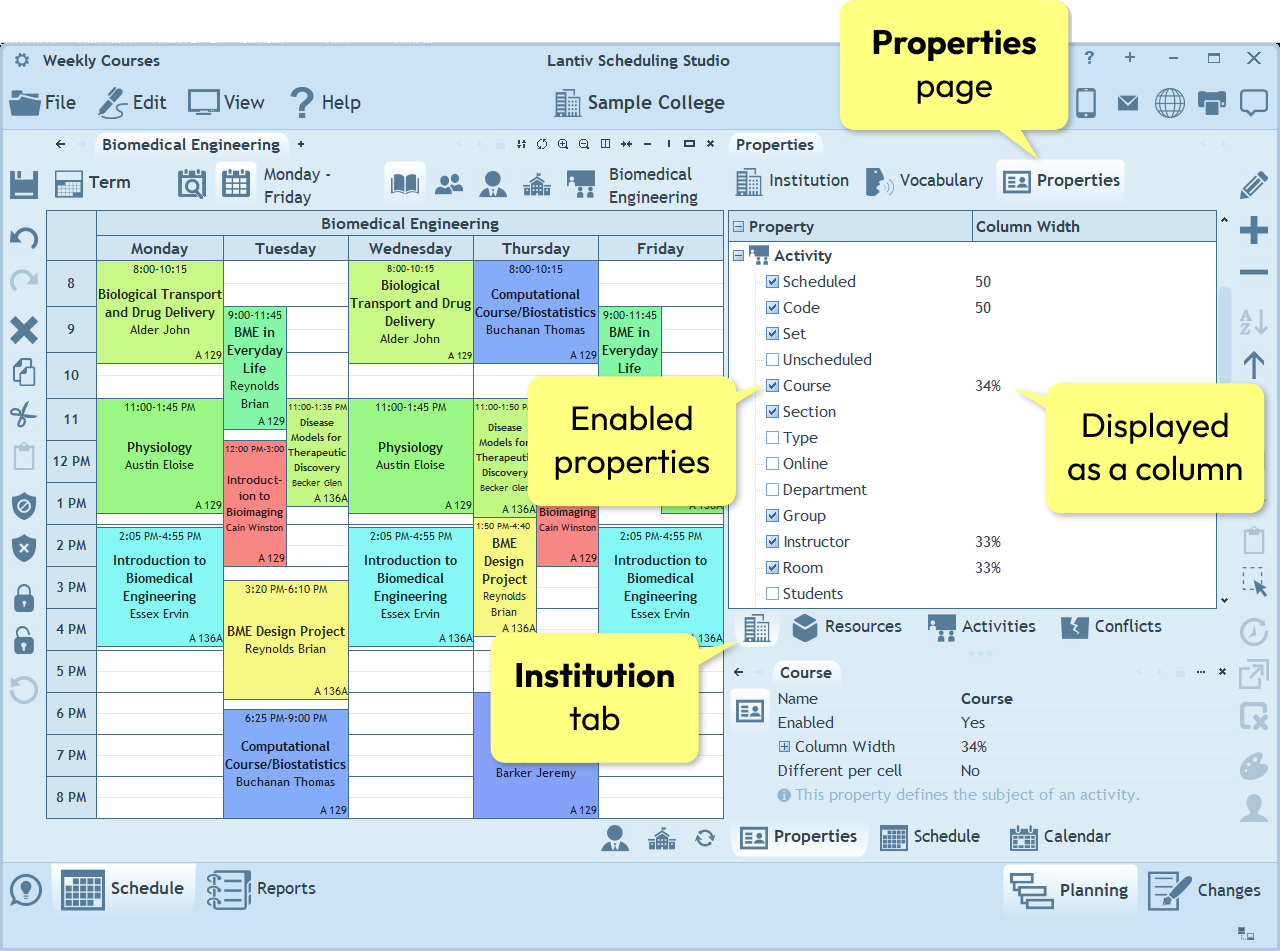
Once you're done, click the Activities tab to see the effect of your configuration.
How to show columns with data from involved resources?
The previous section explains how to show or hide columns for the resources involved in an activity, such as its course, instructor or room.
You can also show additional information about those resources in separate columns. For example, if an activity involves a course, you can display the course's code in another column.
To do this:
- Select the resource property under Activity, such as Course.
- Click the small plus button next to Column Width.
- The properties of that resource will appear. For example, for Course, you will see properties such as the course's code.
- Enter a column width next to any property you want to display. A separate column for that property will then appear in the activity list.
Entering Activities
The Activities pane, located on the right-hand side of the workspace, is where activities are entered and managed. In this section, we will explain how to add activities and how to edit them efficiently.
How to add activities?
The list of activities is organized like a spreadsheet: each row represents a separate activity, and the columns represent the activity’s resources. Since the list is initially empty, you can begin by adding a few rows. To do this, click the plus button on the right-hand toolbar and select the second option: Activities (20). This adds 20 new rows to the list. If you prefer to add a single row, select the first option - Activity.
How to edit activities?
As with resource entry, there are two ways to enter activity data: you can either select an activity and edit its values in the Properties pane, or enable Editing Mode (by clicking the pencil button on the right-hand toolbar) and edit the values directly in the spreadsheet. Since you are starting with a blank spreadsheet, it is usually more convenient and faster to begin entering activities in Editing Mode.
How to fill in the values of an activity?
After adding a few empty rows to the list and enabling Editing Mode, you can begin entering the resources for the first activity. Click inside the cell you want to fill, then click the arrow button to open a pop-up list of resources. Each resource in the list has a checkbox next to it. Click the checkbox to select a resource; click it again to deselect it. When you are finished selecting resources, click anywhere outside the pop-up list. The selected resources will then appear inside the cell.
How to quickly select a single resource in a pop-up list?
If you need to select only one resource from a pop-up list, simply click the resource name instead of its checkbox. This automatically selects that resource and immediately closes the pop-up list, so there is no need to click outside it. This shortcut speeds up the process. This method works in all pop-up lists throughout the program.
How to modify a property of multiple activities at once?
To speed up activity entry, the program allows you to apply the same value to multiple activities without editing them one by one. There are two ways to do this:
- Using the Properties pane:
- First, select multiple activities. You can hold down the Ctrl key while clicking individual activities, or click the first activity and then Shift+click the last to select a range. Once the activities are selected, change the desired property in the Properties pane. The new value will be applied to all selected activities.
- Using copy and paste in Editing Mode:
- In Editing Mode, select a cell whose value you want to replicate and press Ctrl+C to copy. Then select the target cells and press Ctrl+V to paste.
How to quickly create one activity for each resource?
Suppose your institution has 100 courses and you would like to create 100 activities — one for each course. Instead of selecting courses separately in 100 different rows, you can proceed as follows:
- First, select all courses for a single activity by clicking the checkbox at the top of the pop-up list. This creates one activity that includes all 100 teachers.
- Select the cell containing the 100 courses and press Ctrl+C to copy it.
- If necessary, add enough empty rows to the list (at least 100 in this case) using the plus button.
- Select the first empty row you added, right-click, and choose Paste One by One (or press Ctrl+1):
Explanation: The Paste One by One function distributes the copied resources across separate rows. When you copy multiple resources from a single cell, this function pastes each resource into its own activity.
Note: If you copy multiple cells containing multiple resources (for example, 100 courses and 50 programs), the program generates all possible combinations (5000 activities in this example).
Finally, if you no longer need the original row, select it and click the minus button to delete it.
How to enter length and quantity?
The Length and Quantity fields of an activity are text fields that are entered using the keyboard. Click inside the relevant field and type a value, such as "2:30" (meaning two hours and a half) or "2" (meaning two periods).
Notes:
- If the quantity is not limited or not important, enter 0 in the Quantity field. The zero will automatically be displayed as the infinity symbol.
- If the length is one period, you may leave the Length field empty, since one period is the default value. In all other cases, the length should be specified.
- If an activity has different lengths on different days, enter the minimal length here. This provides a starting point when dragging and dropping the activity into the timetable. You can always adjust the length later using the Properties pane or by holding down the Shift key while dragging the cell's time markers.
The next chapter: Scheduling.